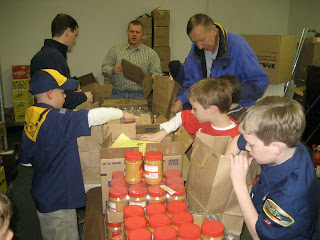
Our standard procedure is that no school means no pack meeting (among other things, the building is likely to be locked and cold). Granville schools are closed for Thursday, Jan. 15, so the monthly third Thursday pack meeting is cancelled. Friday isn't looking too good, either . . .
For Pinewood Derby info leading to weight testing Friday, Jan. 23 and racing on Saturday, Jan. 24, scroll on down for the flyer text, copied at earlier posts. We will continue to post hints and tips here over the next week and a half for Pinewood car crafting -- with sandpaper and model paints, it's never too late!
(Also, info on the Feb. 8 hockey game in Columbus for OSU can be found by scrolling down into the December pack meeting post.)
Meanwhile, here's some quick tips courtesy of Buckskin Council, Charleston WV:
Pinewood Derby Tips and Hints FRICTION: One of the best ways to eliminate friction is graphite. A good dosage may not do wonders for the paint job, but it will for your axles (hopefully you didn't glue the axles too far in or that will impair the wheel). Most axles in the kits have burrs on them around the head. De-burr the axles with a small file.
WEIGHT: It boils down to this, the closer you get to 5 ounces without going over, the better off you will be. The placement of the weight on the car (front or back) is an item which has been argued for years. Weight toward the rear seems to work best, along as the front wheels track straight. Just remember – gravity is the only power these cars use.
AERODYNAMICS: There are just about as many arguments on this topic as there are Pinewood Derby racers. It has been tried, several times, to race a car, as is, straight out of the box with no cutting, shaping or painting of the wood. These cars seem to perform, on average, just as well as the low, sleek, aerodynamic models. The bottom line is: Let the boy design the car, and help him achieve his design! If the adult wants to tinker with the car, tinker with the wheels and axles. The car design has almost no bearing on the outcome of the race.
ALIGNMENT: Make sure that the car's wheels are placed as straight as possible. Place the car on the floor and roll it about 8 to 10 feet. The car should go in a straight line. Adjust with the axle placement to make double sure the car will roll straight.
WHEELS and AXLES: Make sure that the axles are glued securely to the wood. Also ensure that the wheel is not glued to the axle. The wheels are single most important part. Make sure the wheels are on straight and turn freely.
DESIGN / SHAPE: The finish line uses electronic infrared sensors to detect the car moving across the finish line. These sensors are directly centered in each lane of the track. The starting gate of the track uses a bolt in the center of the track. This is to ensure that the length of roll each car will have to the finish line sensors will be the same for each car no matter what the shape of each car is. Keep a high track clearance so that nothing has a chance to rub on the underside of the car. Remember that the cars straddle a wood lath as they roll down the track.
PAINT: Let your imagination run wild!! Whether you use 50 coats of hand rubbed lacquer, olive drab or no paint at all, all it will do is affect the looks of your car. It will not run any faster or slower whether it's red, blue, green, yellow, flames, no-flames, or pink polka-dots!! Let the boy paint the car. Drips of spray paint don't slow the car down.
ACCESSORIES: Glue those Lego and Pokemon characters in! Anything that falls off in the race stays off. This can lighten you car enough to slow it down.
For much, much more, see
http://derbytalk.com


